Create a MoveIt 2 Package for Your Custom URDF Robot in ROS2 Jazzy
How to seamlessly integrate MoveIt 2 with your own URDF-based robot in ROS 2, enabling advanced motion planning and interactive visualization in just a few straightforward steps.

⚠️This Tutorial is tested on ROS2 Jazzy
Prerequisites:
Install Libsdformat14
Its a Prerequisite required for later, its missing for some reason and its not available in the Ubuntu Repos by Default so install it from the OSRF Repos using:
sudo apt install wget lsb-release gnupg -y
sudo wget https://packages.osrfoundation.org/gazebo.key -O - | sudo apt-key add -
sudo sh -c 'echo "deb http://packages.osrfoundation.org/gazebo/ubuntu-stable $(lsb_release -cs) main" > /etc/apt/sources.list.d/gazebo-stable.list'
sudo apt update
sudo apt install libsdformat14
Install Moveit
sudo apt install ros-jazzy-moveit ros-jazzy-ros2-control ros-jazzy-ros2-controllers -yMoveit Setup Assisstant
If you already have your URDF Description package prepared in your local workspace, then make sure to source the local workspace along with the base ROS2 Workspace to ensure that there are no discrepancies while loading the URDF.
source /opt/ros/jazzy/setup.bash
cd colcon_ws
source install/setup.bash
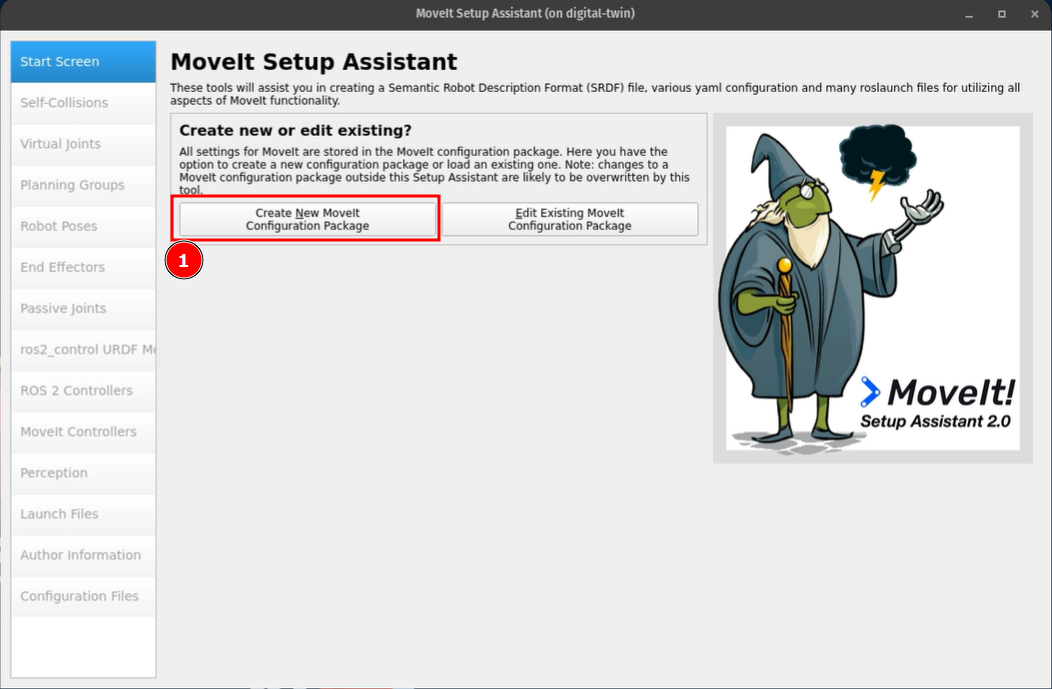
ros2 launch moveit_setup_assistant setup_assistant.launch.py This should launch a new window , so click on Create a New Moveit Configuration Package as seen below:
This should now Prompt for the Location of your URDF so first Browse and then Load Files as seen below:
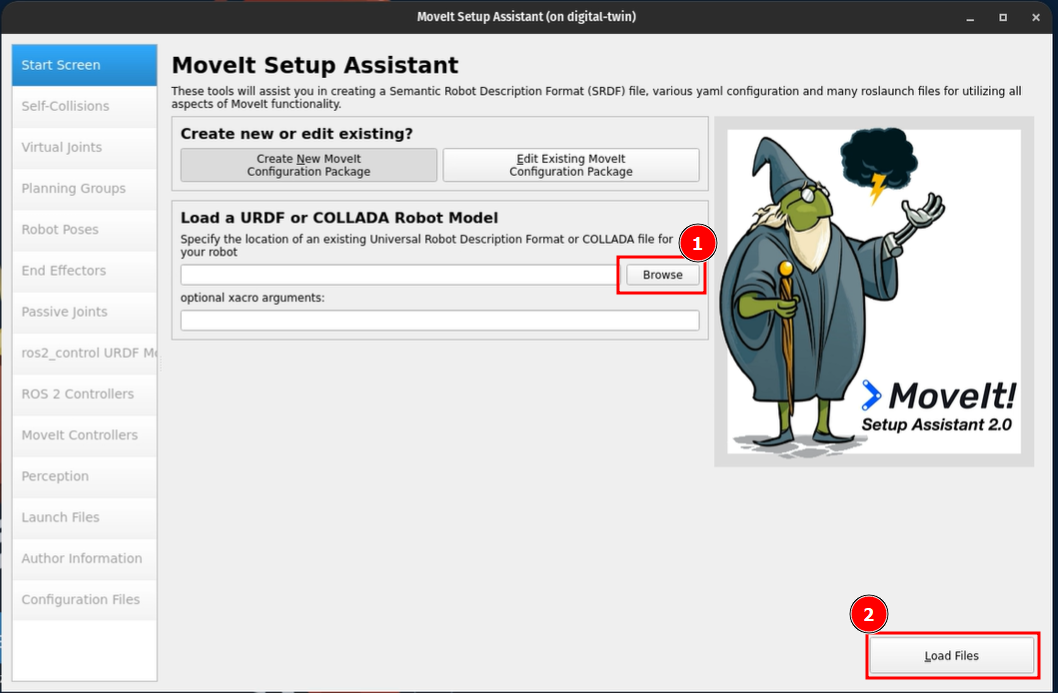
In My Case, I'm Loading My CanadaArm2 URDF, (covered in previous Tutorials here and here) and It should give a visual preview on the right of the MoveIt Window and then to proceed with the installation, Click on Self-Collisions on the left pane as seen below.

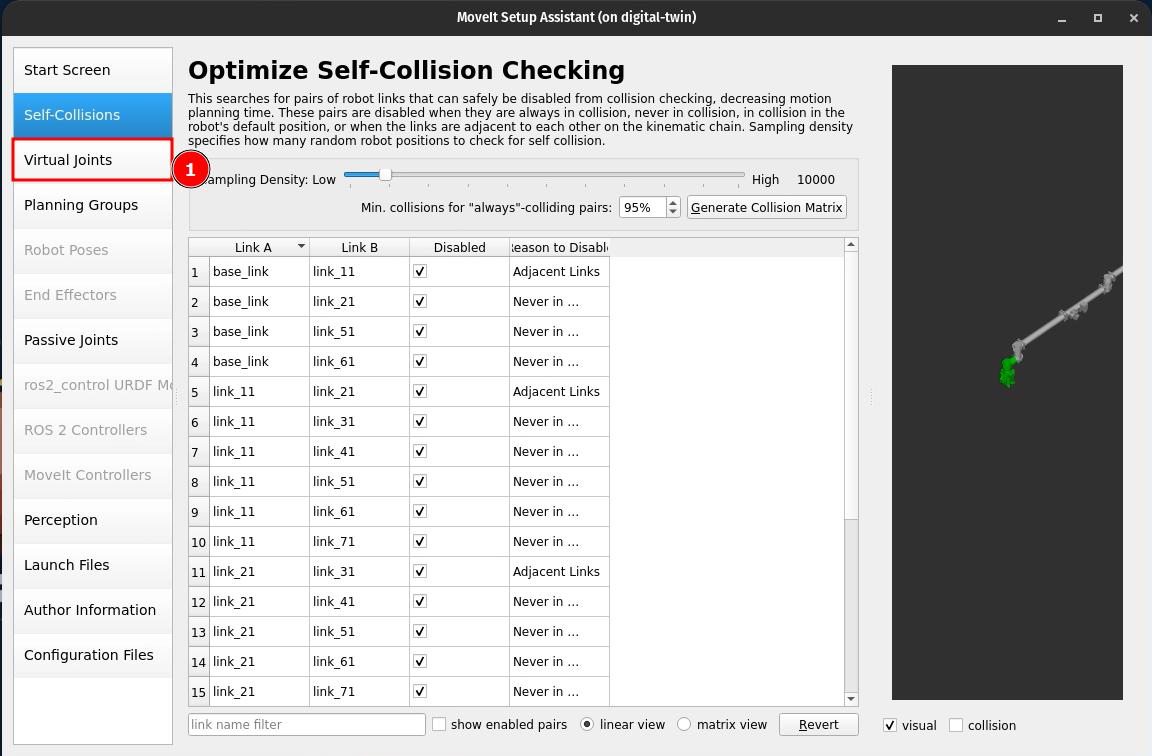
I left the Sampling Density at Default and the Minimum collisions for "always"-colliding pairs at 95% then click on Generate Collision Matrix.

And this should generate a table. If you are happy with the defaults then proceed to the next option by clicking Virtual Joints as seen below:
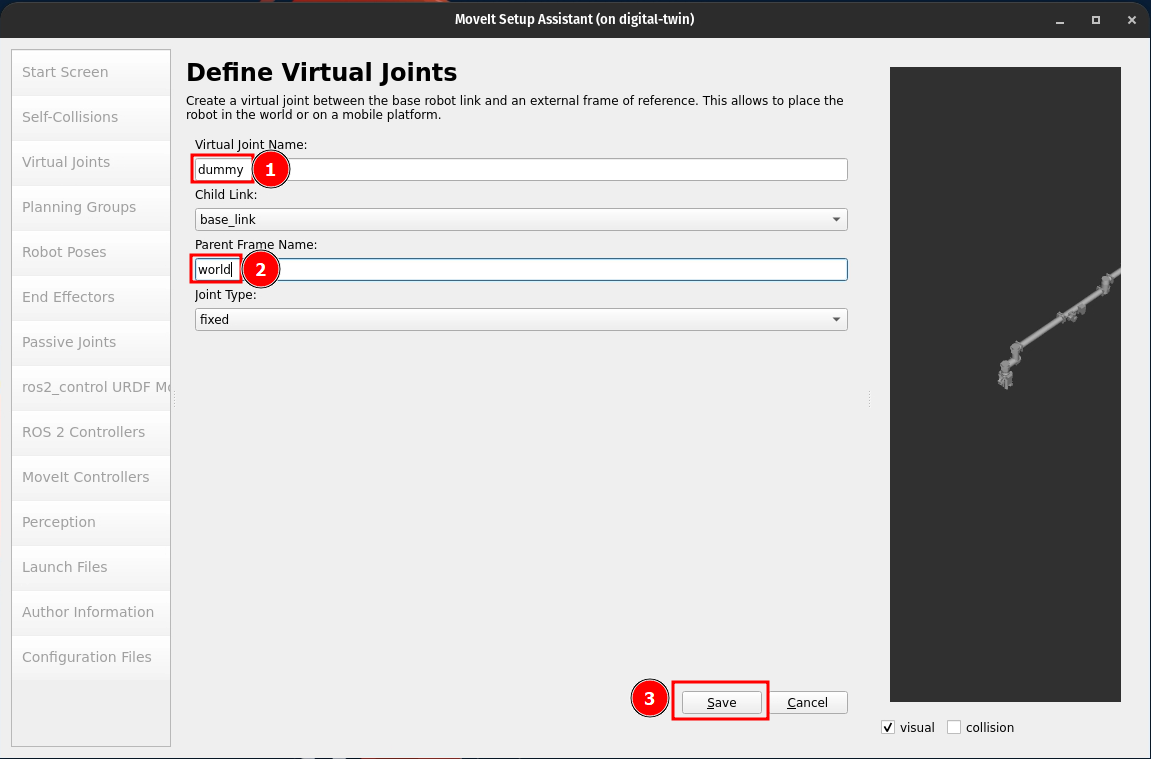
Now Click on Add Virtual Joint, to Add a dummy joint to plant the robot to the world frame.
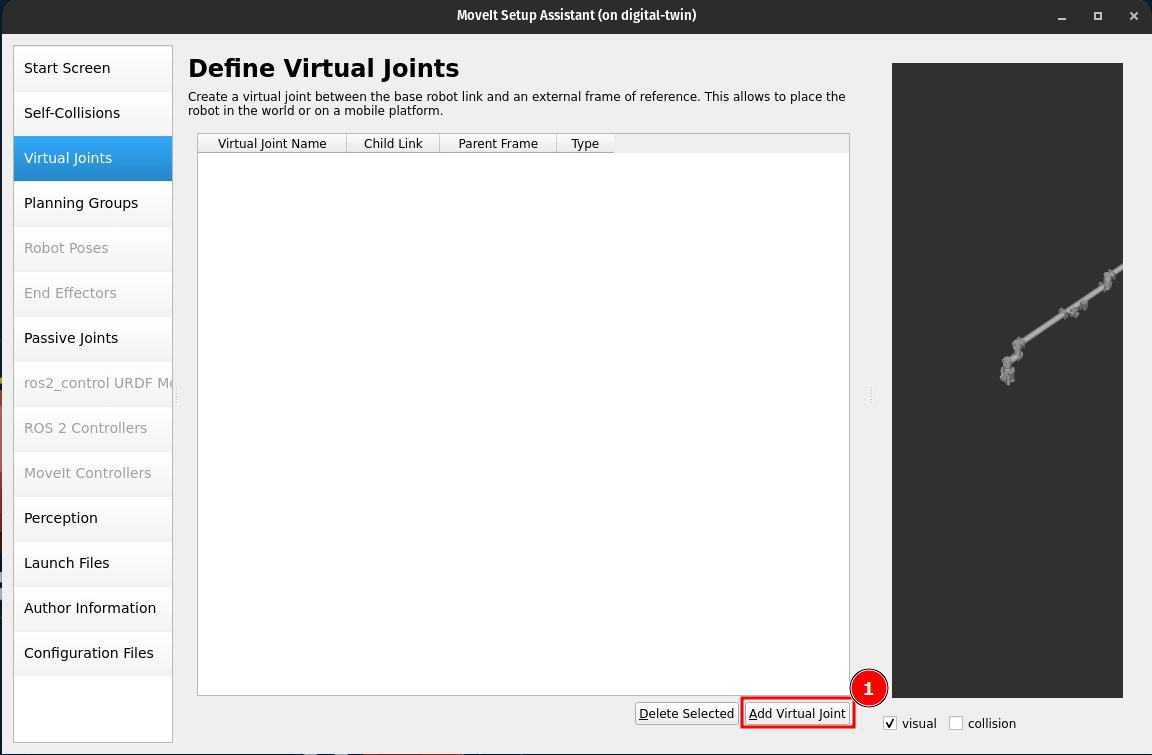
Give the Virtual Joint a name and the Parent Frame as world , for a Static Robot.
For a Moving Robot, No Virtual Joints would be required.
Click on Save, as seen below.
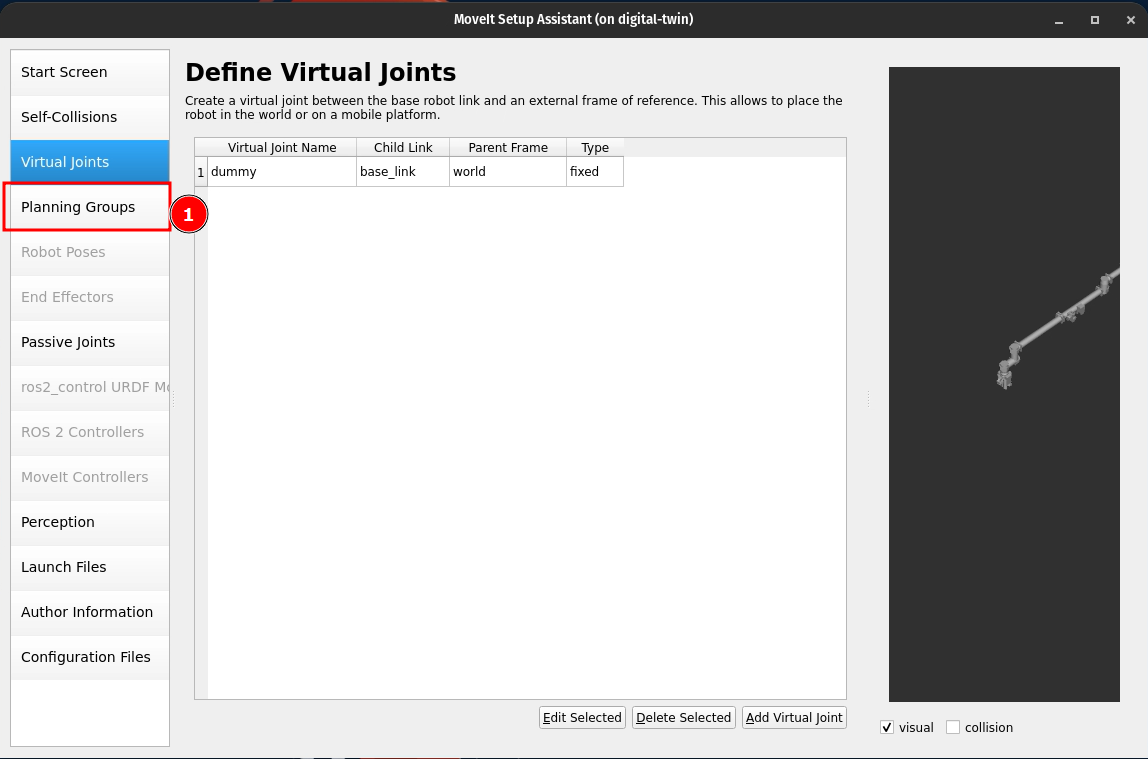
This should now update the table as seen below, and now proceed with the Setup to the Planning Groups (Refer to the Image below, if lost):
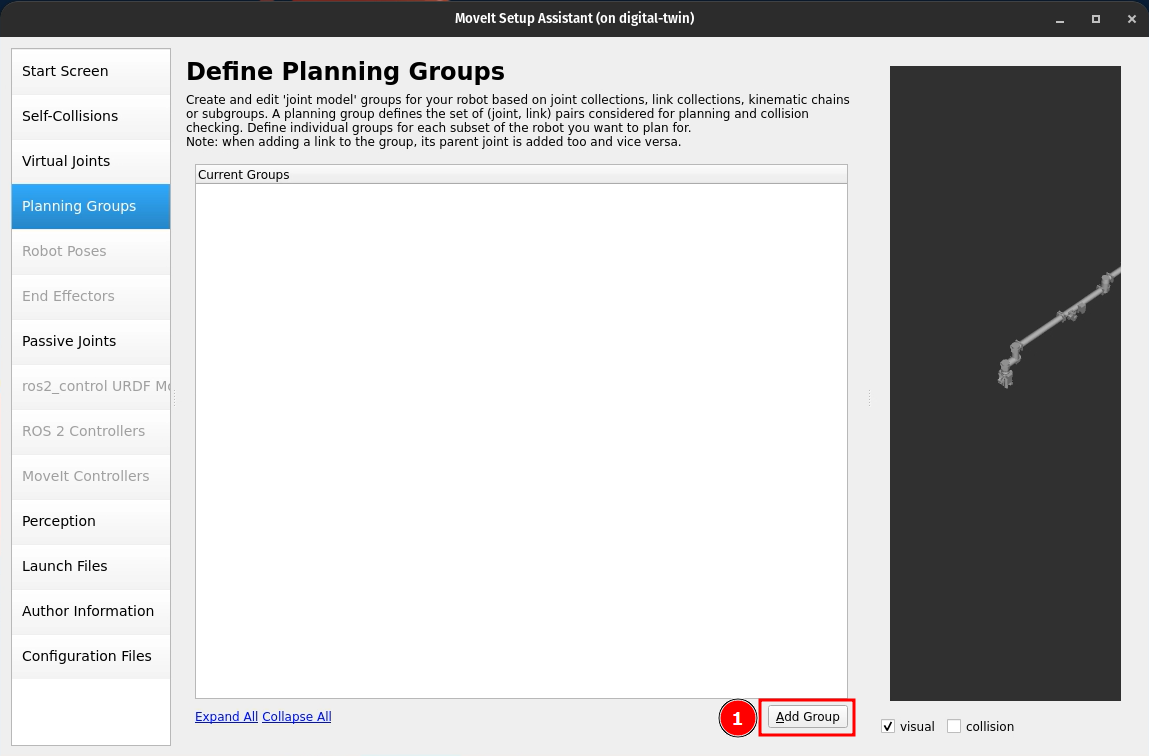
Now Click on Add Group, Refer to Image Below:
Now Give a Group Name and then Proceed with Adding a Kinematic Chain by Following below:
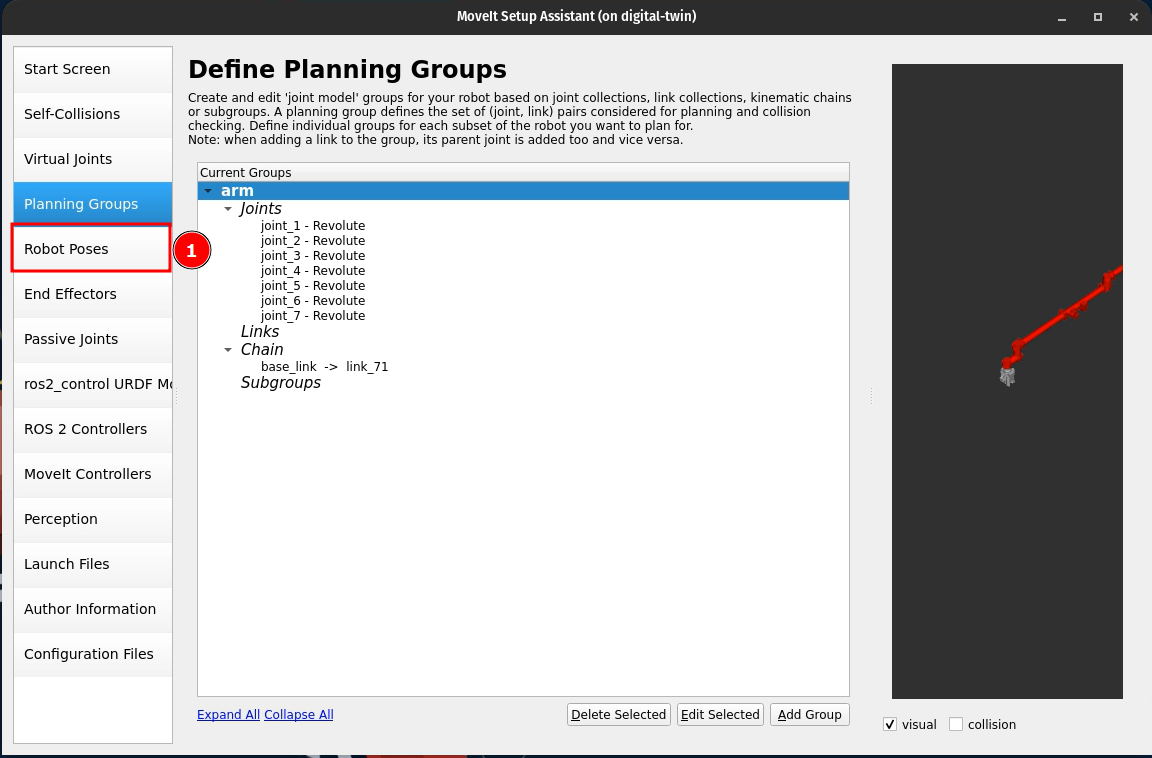
Now the Current Groups should be updated. Now setup Joints by following below:
You can try other solvers like pick_ik for the Solver and Change the Default Group Planner to something likeRRTConnect, Although they have been set toNonefor the sake of this tutorial.
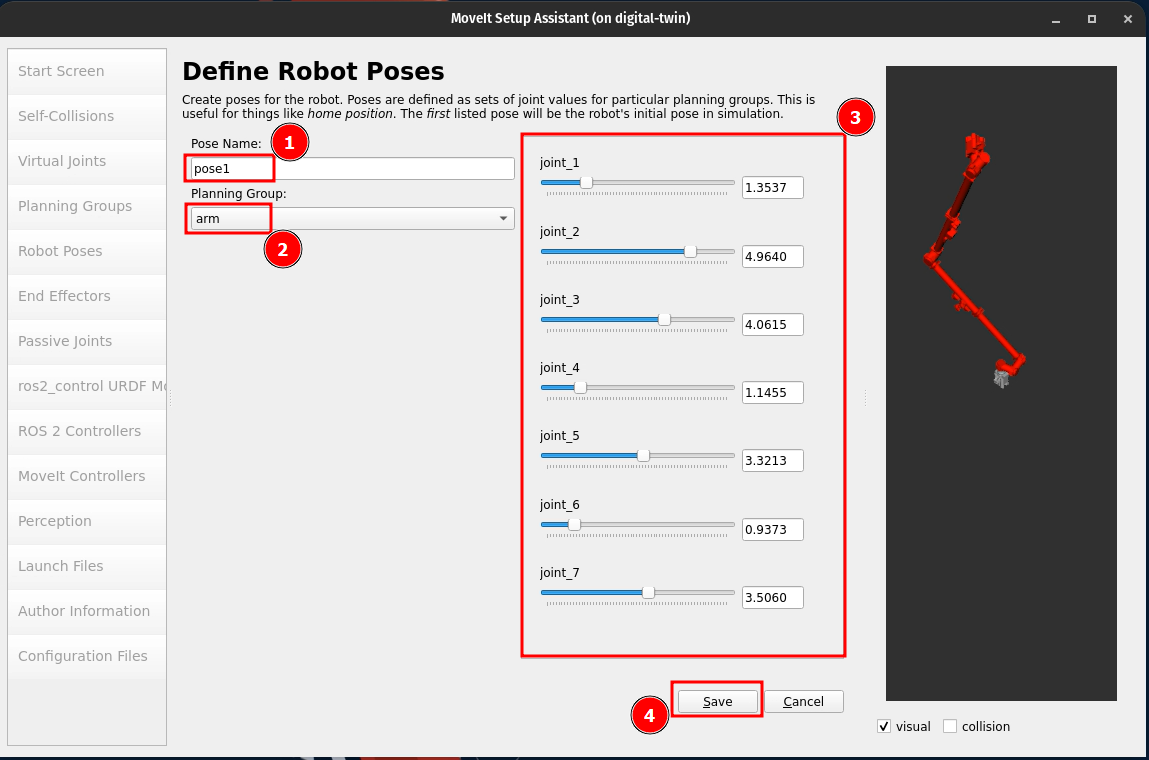
Now Proceed to the Next Step by Clicking on Robot Poses as seen below:
Now Click on Add Pose, as seen below:

Now give the Pose Name, choose the Planning Group (It will default to the one created in the previous step if there is only one Planning Group created) and then configure the joints to a pose of choice and click Save. (Refer Image Below):
As I do not have an End Effector in my Robot, and I have no Additional Joints in my URDF, I will be skipping End Effectors and Passive Joints and proceed with ros2_control URDF Modifications, and configure as seen below:
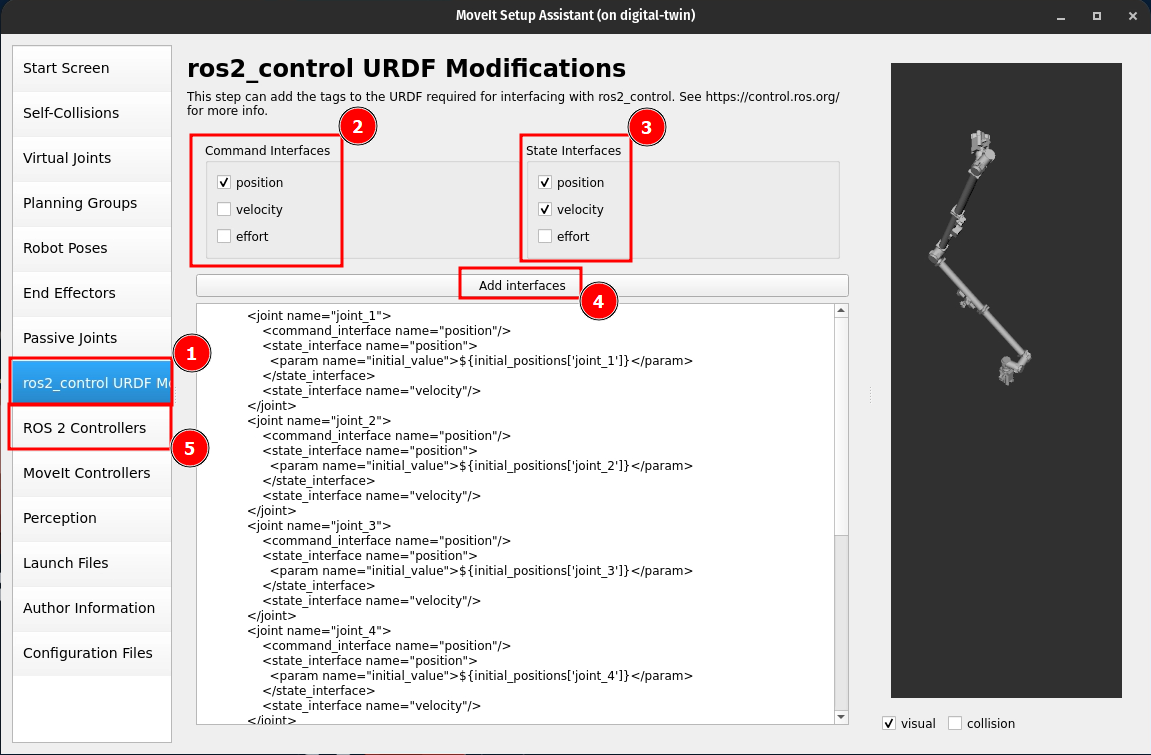
⚠️Make sure to click on Add interfacesAs for ROS2 Controllers, Follow the Image Below:
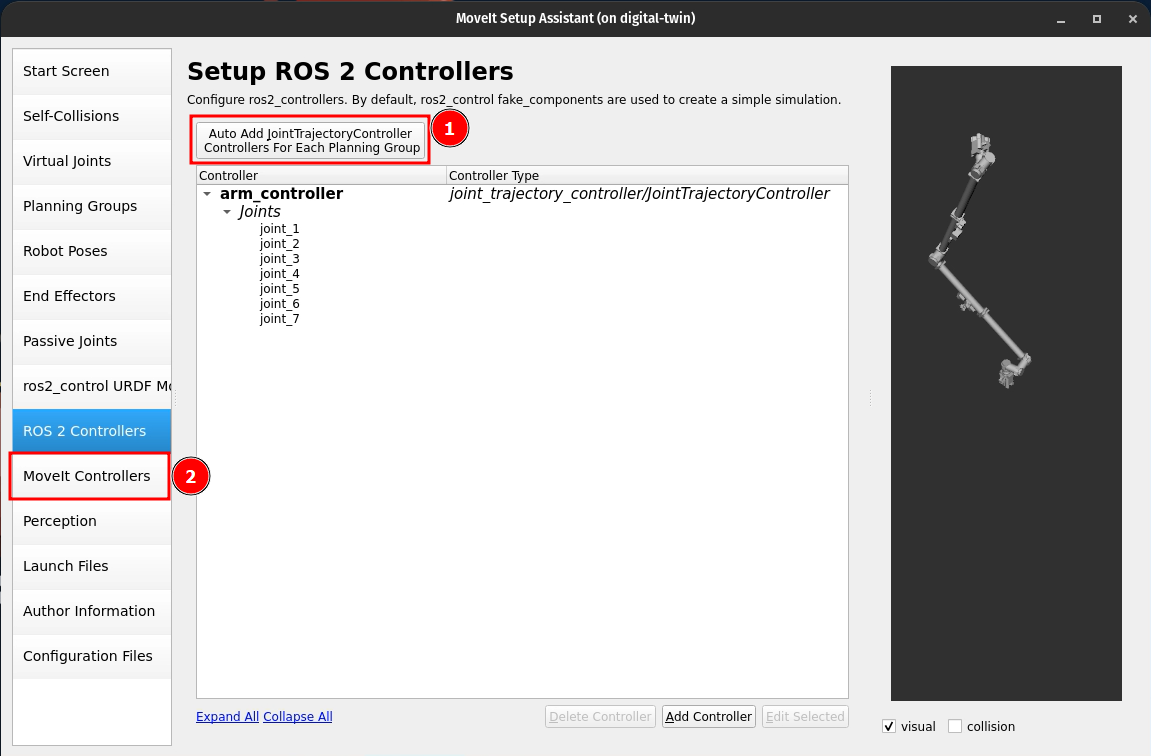
As For MoveIt Controllers, Follow the Image Below:
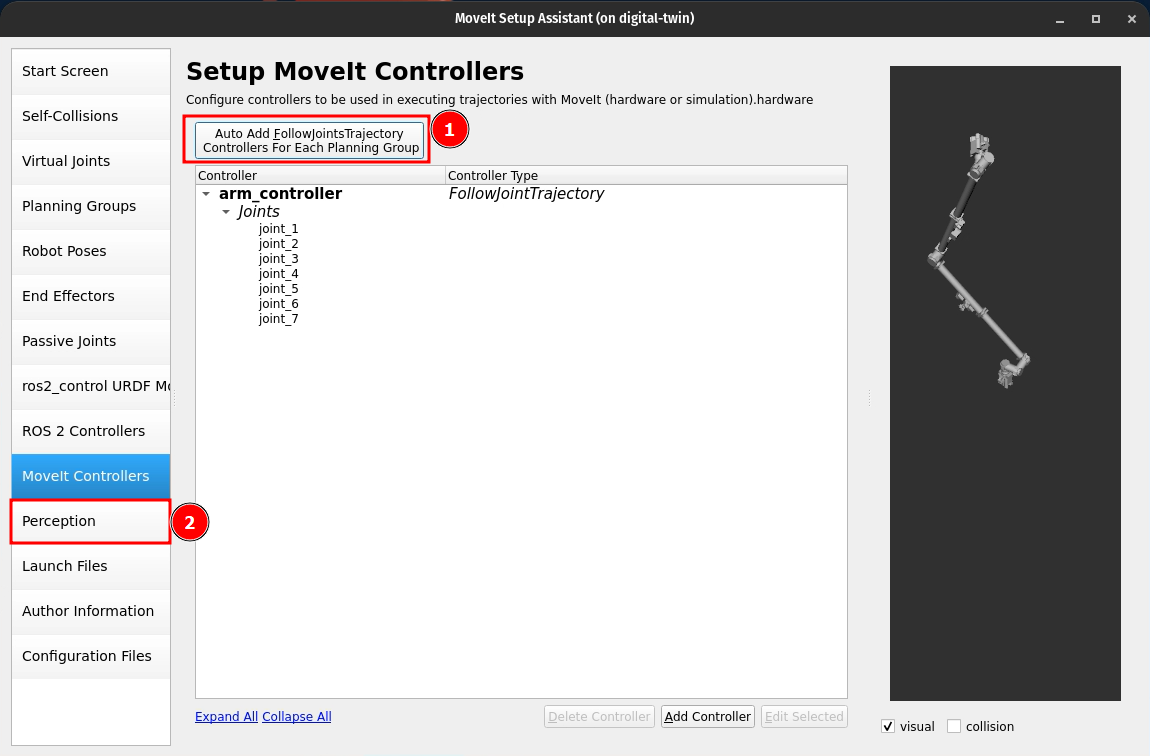
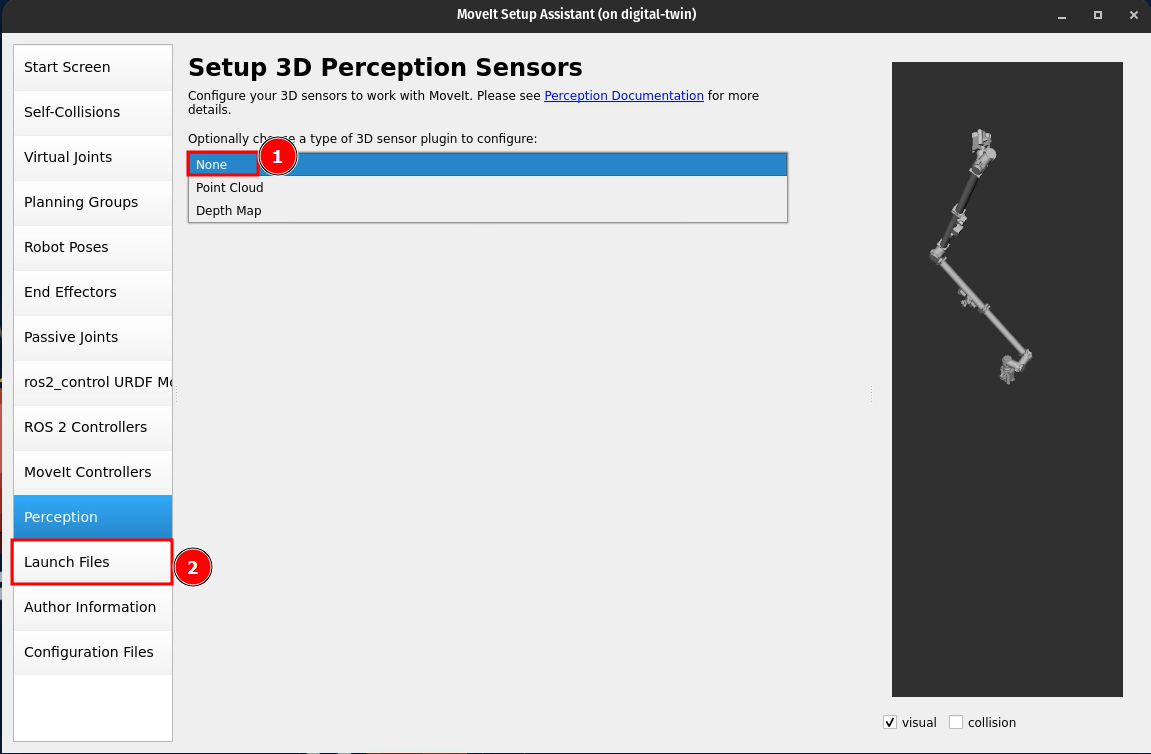
I do not intend to use this particular robot for either a PointCloud or a Depth Map, I'll Set it back to None and Proceed to the Launch Files.
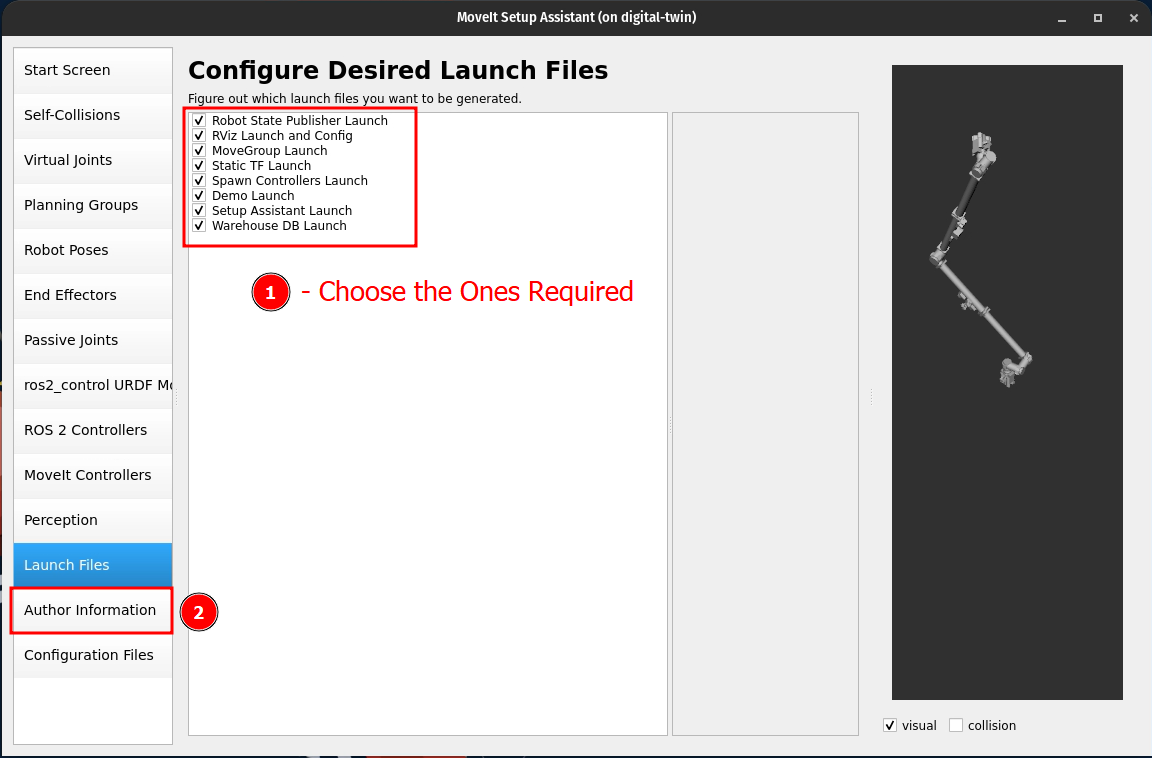
I didn't have anything to change here, so proceed to Author Information (Refer the Image Below):
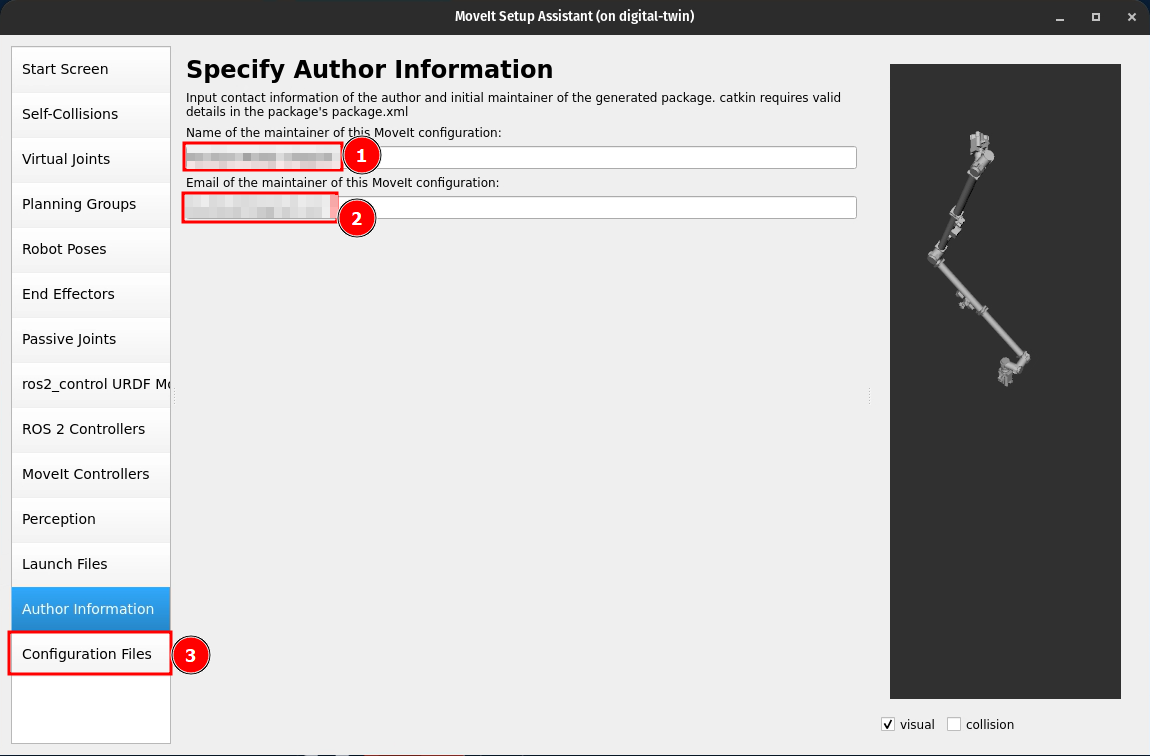
Give You Name and Email in their Respective Fields and then Click on Configuration Files: (Refer to Image Below)
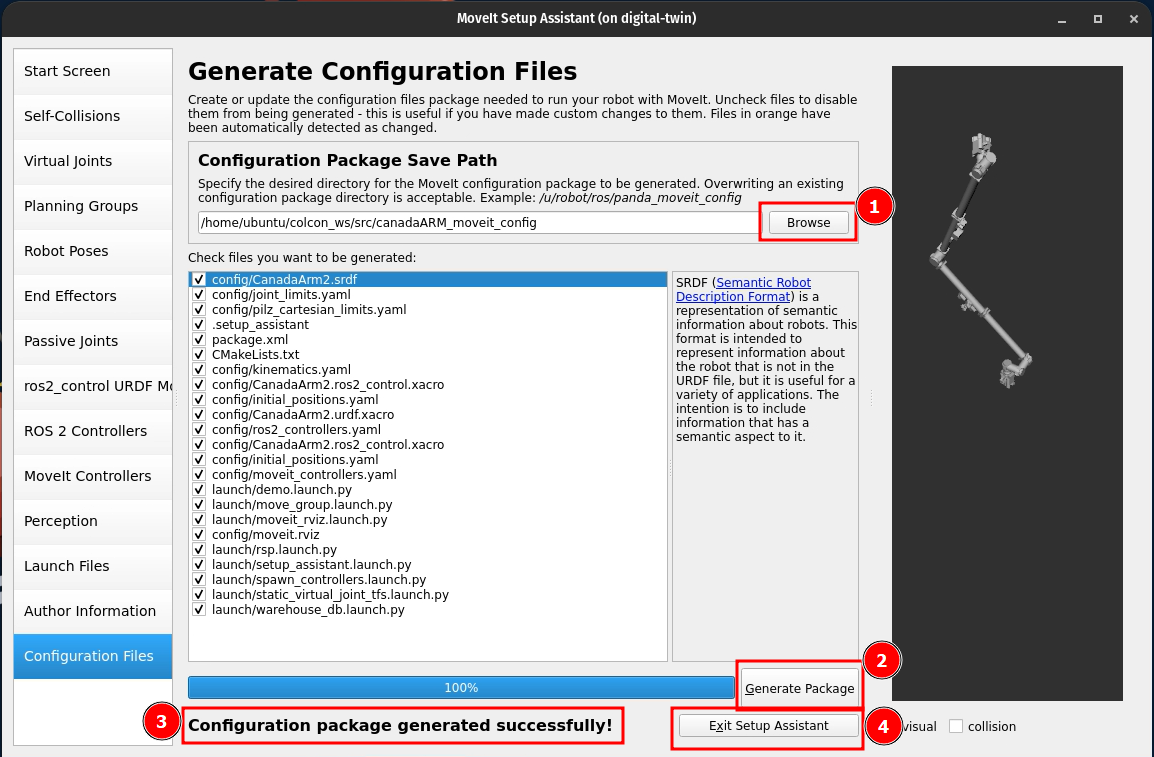
Now Click on Browse, Navigate to your Local Workspace/src directory and Create a New Folder and try to name it along the lines of <urdf_package_name>_moveit_config
and Click on Generate Package,
If The Process is successful, then a Message should Show up saying that the Package has been successfully Generated and then Click on Exit Setup Assistant to safely close the Moveit node. (Refer Image Below):
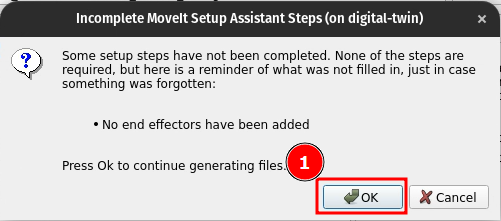
Since I didn't have any end-effectors setup in my Configuration a Warning like the one below will pop-up (Its a Warning !, so We Ignore...We only care for Errors) and Click on OK.
Fixing The Generated Package Files:
Open The Newly Generated Package (The Directroy) in the Favourite Editor of Choice.
joint_limits.yaml
P.S on VSCode,Ctrl+Hfor replace option and thenCtrl+Alt+Enterto Replace in all instances within the file
Integers to Decimals
By default, the values Generated are in Integers, but Moveit only works with Decimals, so if you have something like
max_velocity: 100then change it to:
max_velocity: 100.0Enable Acceleration:
By default, Acceleration Limits are Disabled and for every joint it looks like:
    has_acceleration_limits: false
    max_acceleration: 0
to change it to look like:
    has_acceleration_limits: true
    max_acceleration: 100.0
Build the Package
cd ~/colcon_ws
colcon build --symlink-install
Source the Package
source install/setup.bashRun Moveit
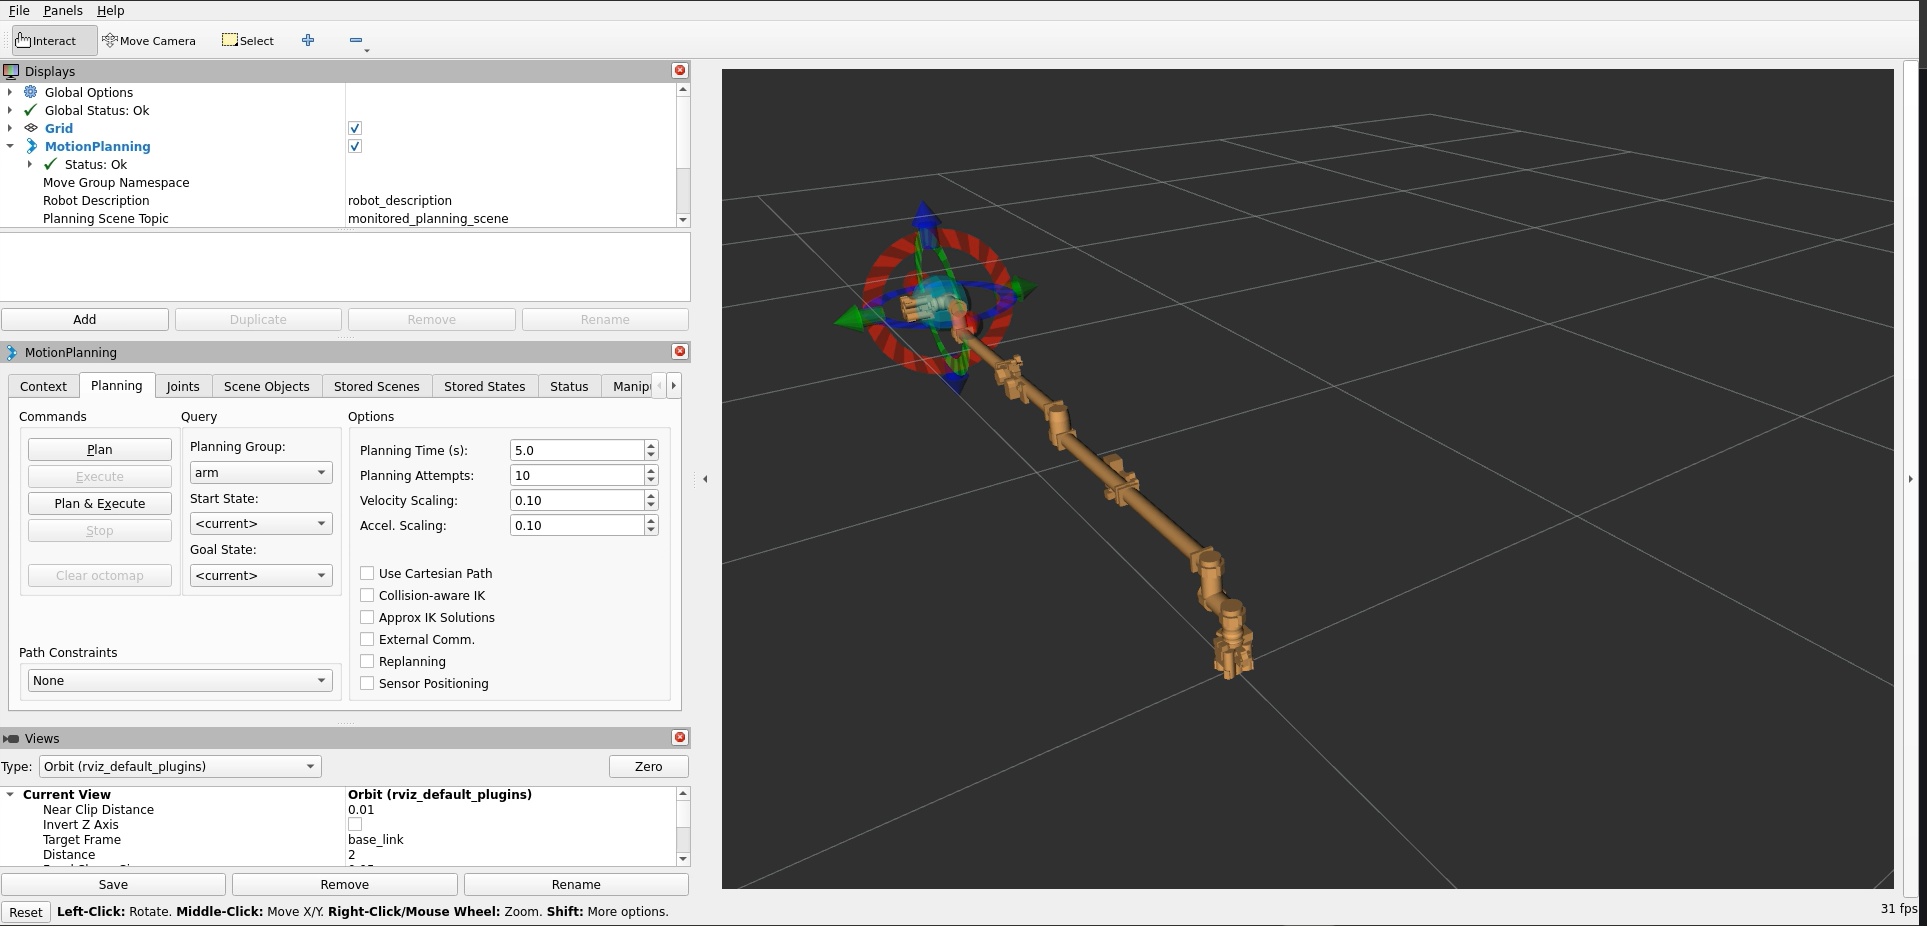
ros2 launch canadaARM_moveit_config demo.launch.py use_sim_time:=falseThe Robot should load in Rviz, as seen below:
Well That's all for now Folks,
Happy Simulating :D